Taking better photos – A beginners guide to getting the most out of your camera: Exposure
In our last two articles in the ‘Taking Better Photos’ series for photographic beginners we covered aperture (that is, f stops) and ISO. This time we are going to take a more detailed look at the – very much related – world of exposure.
In black and white terms – to pardon the pun – exposure is simply a measure of the amount of light that enters the camera and falls on the camera’s sensor (or on the film if you’re not using a digital camera).
Let too much light in and your photo is going to be either completely white or very bright, let too little light in and the photo may be completely black or at least very dark. In both extremes you will have very little detail showing in the photo, and no amount of touching up in Photoshop or other post-processing tool will be able to help.
There is no ‘perfect’ level of exposure – it depends entirely on what you are looking to achieve with your photo. If you are looking for an artistic effect or you want to highlight particular details, the exposure you need will be different from the norm.
Most digital cameras allow you to automate all the main settings on the camera. When you are in auto mode, the camera will automatically assess the current light conditions and will set your aperture and shutter speed to make sure that the combination gives what it thinks is the correct exposure.
 The secret is knowing when to override these automatic settings to get exactly the photo you are looking for.
This is because the camera (and here we’re giving it a ‘mind of its own’ just to illustrate the points!) will want to ‘average out’ your photo to conform to a standard overall colour known as ‘18% grey’.
But here are a few situations where this automatic setting – which works for most photos – may not give you the exact photo you’re looking for…
- A shot where there is a lot of white eg snow – the camera’s automatic setting will assume the photo is too bright and adjust as it thinks necessary
- Night photography – the opposite effect occurs
Which camera settings impact exposure?
The two main settings which directly affect ‘luminous’* exposure are …
- Aperture and
- Shutter speed
The third component, which we have already covered here, is ISO, a setting that used to apply to the film itself (different film would have different ISO/’speed’ characteristics) and now is simply a setting governing exposure in digital cameras. You can also change the exposure level at the post production stage, but you will only be able to work with what the camera itself has given you.
Aperture
The last article covered this in some detail, and in very general terms the larger the aperture (and the smaller the f stop number), the more light comes into the camera, and of course the smaller the aperture the less light hits the sensor. Get this setting with too large or too small an aperture and photos are going to be either over or under exposed accordingly.
Shutter Speed
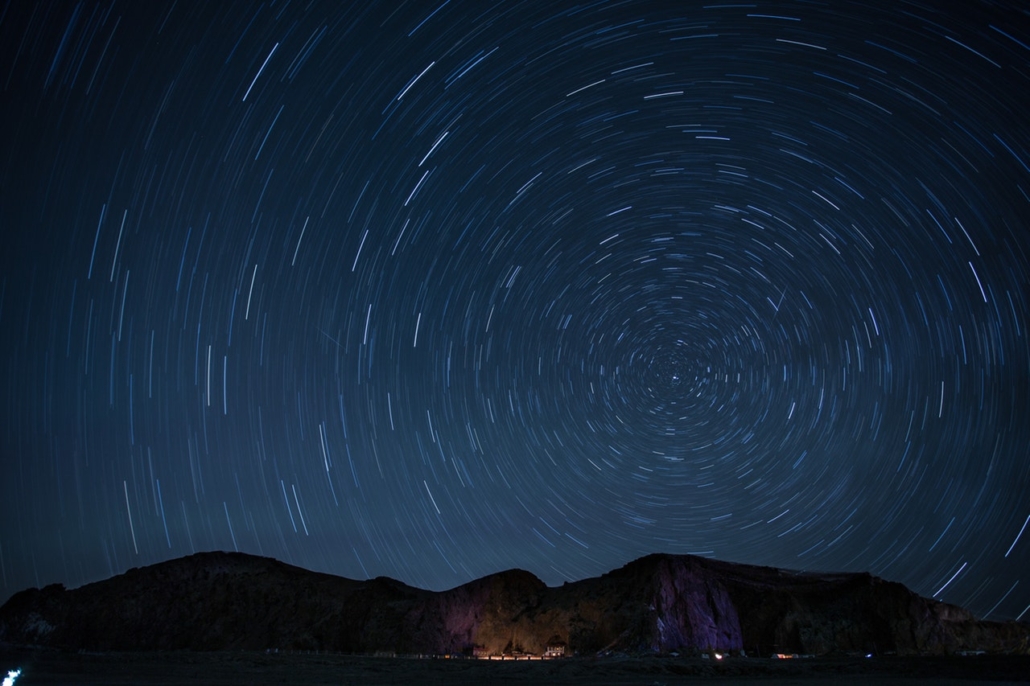
Most modern cameras will allow you to adjust the speed of the shutter – anything from 1/4000 of a second to up to 30 seconds. More specialist cameras allow slower (ie longer exposure) shutter speeds, and some cameras (and even smartphones) have special settings to allow for long exposure photography.
Probably the most frequently seen example of long exposure photography is where an image captures the movement of the star across the sky during the night.
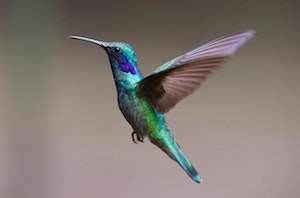 The faster the shutter opens and closes, the less light falls on the sensor and so the darker the image will be. Where you want to take a photo of something that is moving fast, but you want to capture detail or you want to make the fast object appear frozen in time, you need a fast shutter speed.
You will get detail but the photo will be naturally darker. If, on the other hand, you want the photo to convey a sense of movement, or you just like the effect of a slightly more blurred image or background (depending on which is moving – the object or the background), then a longer shutter speed is what you need.
These two settings – aperture and shutter speed – work together to determine the final exposure of the photo. Combine these two settings with the ISO setting and you have three factors that operate together to affect the final exposure level.
Sometimes referred to as the ‘exposure triangle’ the precise combination of these three settings gives a certain ‘EV’ or ‘Exposure Value’ for each combination.
The only way to really learn how these different settings interact and which combinations of settings are most suitable for which types of photos, is to actually go out and practice in the real world! However, the following is a quick and dirty guide as to what settings should generally be used when (although feel free to experiment!)…
Landscape type shot (nothing moving in shot) AND camera is on a tripod (minimising ‘camera blur’, which happens when the camera is handheld and the blur is caused by the photographer’s hands not being perfectly still) – shutter speed is largely unimportant
- Wide-angle portrait or outdoor photos where there is minimal movement in shot – 1/50th second (or faster)
- Telephoto lens photography – 1/100th second (or faster) – this compensates for the exaggeration of blur (camera blur and object blur) with photos
- Rapid action shots eg sports or wildlife action shots – 1/500th or faster
As we mentioned above, most digital cameras today allow you to fully automate the settings that affect exposure. There are also other settings you can choose which allow you to manually vary one specific setting and then the camera itself adjust the other settings as it sees best. One of theses is the AP setting – AP here stands for Aperture Priority, which allows you to set the aperture manually and then the shutter speed is automatically adjusted by the camera.
To give yourself the best chance of getting a sharp and detailed landscape photo for example…
- Use a tripod if you can
- Switch AP on
- Choose your aperture – f8 is a good general setting
- Leave ISO at its standard setting of 100 ISO
The camera will then control the shutter speed. Once you have reviewed the first shot, you can adjust settings accordingly if the shot is too light or dark or if there is any (unwanted) blur.
Where you are shooting portrait photography, you can still use these options, but you may need to compensate for blur caused by the subject, or if the camera is handheld, by choosing a faster shutter speed. And if that makes the image darker you can for example compensate by changing the ISO setting.
A quick overview of common digital camera options controlling exposure
In addition to the ‘Manual’ setting which allows you to control everything manually on the camera. the following setting options can also be used…
- Aperture Priority (AP) – discussed above
- Shutter Priority (SP) – effectively the opposite of AP where the shutter speed is set manually and the camera determines the appropriate aperture
- Program (P) – where your camera has this option, it controls shutter speed, aperture & ISO
A few little tricks
There are also a few little ‘tricks’ you can use on some digital cameras to give you a better chance of getting good photos if you ‘tell’ your camera a little bit more about what you are hoping to achieve.
Exposure Compensation
This is normally accessed via a little button marked ‘+/-‘ which you press as you’re adjusting the main dial. One direction will increase exposure and the other will decrease it. Some cameras (generally more high end) have a separate dial for exposure compensation. Ultimately, this is when you’ll have to get out your user manual and check what options your camera gives you.
Auto Exposure Bracketing (AEB)
Some cameras very kindly allow you to take anything from three to five photos is rapid succession at different exposure levels. You can then simply review these and choose the best one. You can also set the levels of exposure you use across these shots before pressing the button to take the shot.
Summary
You have all these buttons on your camera to allow you to control a range of settings. Most of the time the camera itself will choose the best combination of settings in Auto mode, but you should now know when it’s good to override these and when a few tricks and ‘halfway houses’ between full auto mode and full manual mode will get the job done better. Now go out and take some great photos!
*’luminous exposure’ describes exposure relating to light making its way into the camera, as opposed to factors inside the camera (ie ISO settings) that impact the exposure of the photo
Other Resources
Exposure (photography)
Exposure – ISO, Aperture and Shutter Speed Explained
Camera Exposure
Basic Manual settings for cool visual effects. (Canon)
Understand Exposure in Under 10 Minutes
Camera Exposure

