Taking better photos – A beginners guide to getting the most out of your camera: F stops and aperture
When you get your shiny new DSLR – digital single lens reflex – camera, it can be very tempting to use the standard settings to shoot all your photos.
But if you do this you’ll be missing out on some of the advanced features of your camera that will allow you to take much better photos.
In this article we’ll be talking a little bit about aperture and how by controlling the aperture on your camera you can get some really great shots.
What exactly is ‘aperture’?
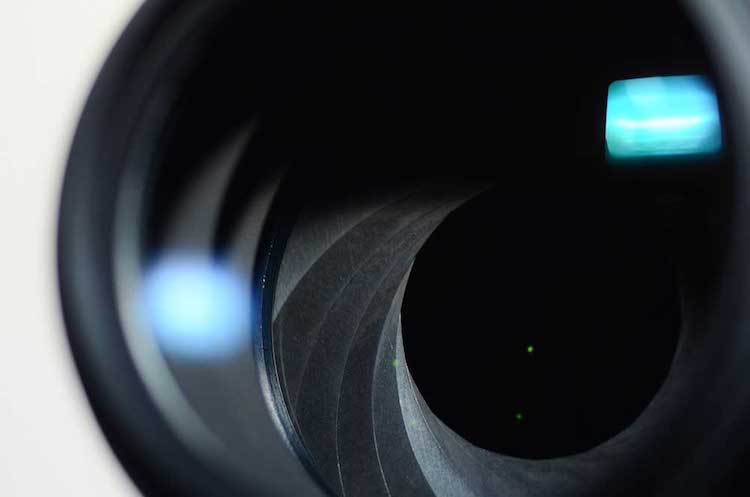
In photographic terms, aperture literally refers to the size of the hole in front of the lens that lets the light into the innards of the camera.
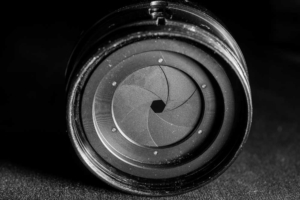
This is controlled with a set of small thin interleaved plates (called a ‘diaphragm’) which move in and out to allow for a range of different sized apertures from completely open to a small hole.
 The best way to think of the function of aperture on a camera is to think about how the human eye works – when there is very little light the iris expands to allow more light into the eye through the pupil (the iris is literally the diaphragm for the eye), and when it is very bright the iris contracts the pupil to limit the amount of light entering the eye.
The diaphragm on a camera does exactly the same thing.
So when you are shooting in a dark environment, you will generally want to have the most light coming into the camera and so the aperture will be large.
The control on the camera for this is called the ‘F Stop’ or “F Number’.
Counterintuitively the smaller this number, the larger the aperture, so for example the f/2 position is a larger aperture than the f/8 position.
![]()
Depth of field
However, this is not all the aperture controls – it also controls the level of focus of different objects being photographed.
So if you’ve ever wondered how to take those great photos where something in the foreground is in sharp focus but the background is blurry, choosing the right aperture setting is the way to do it.
In photographic terminology this is called ‘depth of field’.
Where the background is blurred in relation to object in focus, this is known as a depth of field which is ‘shallow’. Where both the background and the foreground are in sharp focus, this is known as ‘deep’ or ‘large’ depth of field.
In most cases, professional photographers use a shallow depth of field (and so large aperture/low f stop number) for closeup photos or where the photographer wants the viewer to focus on one object or person in the foreground.

Shot at F4 (background is blurred)

Shot at F22 (Background is sharp)
Portraits are often taken with a shallower depth of field as opposed to landscape shots which are generally taken with a high f stop and small aperture to give greater depth of field.
Most modern cameras allow you to manually control both the aperture and the shutter speed.
There are three settings – auto (ie the camera decides what you need), ‘Av’ (or sometimes abbreviated to ‘A’), which means ‘Aperture Priority’ where you are manually setting the aperture, and another setting called ‘M’ where you are manually controlling both aperture and shutter speed.
 If you leave the camera in ‘Av’ mode, it will automatically set the shutter speed to allow in the right amount of light for your chosen f stop position.
If your photos come out too dark or too light with the camera set to ‘Av’, switch to ‘M’ and change the shutter speed.
There are some limitations to what you can do with a camera, and these are largely imposed by the lens itself.
Lenses have maximum aperture ratings and generally speaking the lower the f number that can be achieved by a specific lens the better.
Photographers often refer to these lenses that can work with bigger apertures as ‘fast’ lenses, and you will pay more for them than for standard lenses. Faster lenses also help minimise the effects of camera shake.
Interestingly, there is generally no benefit to having a lens or camera that can get a smaller aperture (high f number) and the standard f/16 smallest aperture setting is perfectly fine for all but the most specialist photography.
Zoom Lenses
Zoom lenses and normal lenses (referred to in photographic terms as ‘prime’ lenses) work differently when it comes to aperture – with most zoom lenses the aperture changes when you zoom in and out, although some more expensive cameras will maintain a set aperture as they zoom in and out.
It is also worth bearing in mind that there is generally a trade-off in picture quality if you opt for a zoom lens – photos taken with a zoom lens can turn out not quite as sharp as those taken with a prime lens and there can also be other issues relating to colouration of the photo, particularly around high contrast edges in a photo.
That’s why when you see a pro photographer open their bag, you’ll often see a whole range of prime lenses as opposed to having just the one zoom lens.
Needless to say, there are some occasions where you want to have a large aperture in bright light, and this can pose a bit of a problem.
There is a way around this though, called a ‘neutral density’ or ‘ND’ filter, useful for example for shallow depth photos in bright sunlight.
But what if I just have my phone?
It’s always easier to take these more sophisticated shots using a conventional DSLR camera, but what if you only have your phone with you?
Technically speaking, as smartphone cameras have their lenses very close to the light sensor, they naturally have a much larger aperture relatively speaking (even though their lenses are tiny in comparison), which could be seen as a good thing!
However there are no moving parts in that lens, so all manual changes have to be made in the phone software. The good news is that both Apple and Android phones do allow you to mimic some of these effects.
On the iPhone, the standard camera app allows you to tell the camera what to focus on by simply tapping on that object on the screen – this is referred to as ‘tap-to-focus’.
You can lock the focus on a specific object by tapping and holding until a yellow box appears saying ‘AE/AF LOCK’, which automatically switches this focus lock on (you can tap anywhere else on the screen to turn it off).
For more sophisticated photography with an iPhone it might be worth downloading another camera app – one called ‘Camera+’ for example allows a lot more control over focus.
On Android phones there are also a range of camera apps that give you more control than the standard built in camera app, and newer Android phones are now coming equipped with some pretty fancy lenses.
So next time you pull out your digital camera – or your smartphone – use some of these tips to take some great photos!

